Description
I’ve always espoused simplicity in fly
design, and the 12-step Stonefly is no
exception.
Don’t be intimidated by the fact that there
are 12 steps needed to complete the fly.
Each step is simple and easy enough for a
beginner to manage. My main purposes in
featuring this new design are: (1) to
emphasize the importance of thinking about
the order of applying materials; and (2) to
demonstrate that a realistic-looking pattern
can indeed catch fish if “action” materials
are used in its construction. I’ve been
testing this pattern on pocket water streams
for some time now, in various colors and in
various sizes. I like it for golden
stoneflies, as well as dark olive, brown,
and black stones. For this month’s fly we’ll
tie it in brownish-olive, size 8.
Tying Instructions
|
|
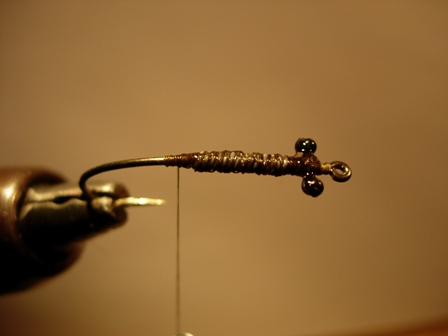
1. Smash the hook barb unless you are using
a barbless version of the hook. Apply 10
wraps of .020 lead wire to the hook. Flatten
the wire with flat-nosed pliers; cover the
lead with Flexament and thread.
2. Tie the eyes on ahead of the lead and
about 1 eye-length behind the eye. It’s
important to leave this small space ahead of
the eyes.
|
 |
|
|
|
|
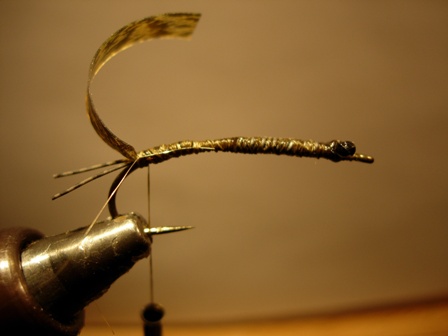
3. Return the thread to the rear of
the hook and tie in the tails. They
should be no longer than Ľ”.
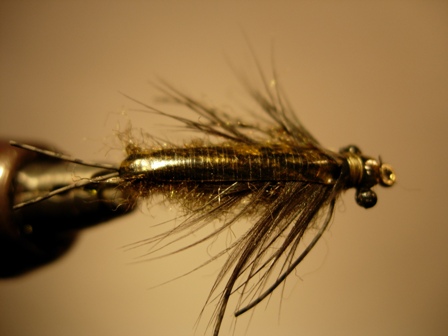
4. Cut a piece of Thin skin, leaving the
backing on it for now. The piece should
be Ľ” in width, and about 1” long. Cut
one end to a shallow “v” and pull the
material from the backing. You will
notice that one side is shinier than the
other; tie the pointed end in just above
the back of the barb, shiny side down
(when it’s pulled over the top, the
shiny side will be on top).
5. Tie in the ribbing material at the
same point, and pull it backward out of
the way.
|
 |
|
|
|
|
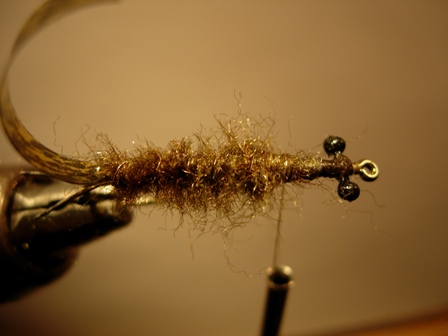
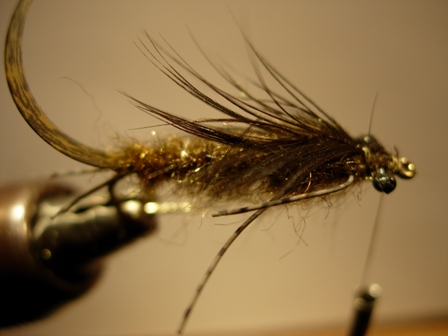
6. Dub the abdomen—which will be the
rear 2/3 of the hook. Use a stiff
brush, wire brush, or similar tool
to brush out the sides of the body,
and pull the dubbing out to the
sides with your fingers. Trim the
abdomen to a “v” shape (this gives
it a nice taper) back to the tail
(careful not to cut the tails).
7. Rib the abdomen, weaving the wire
into the dubbing; this gives the dubbing
the look of “gills.”
|
 |
|
|
|
|
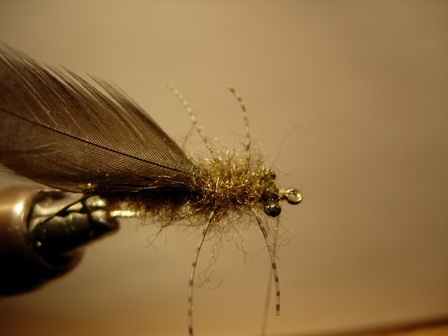
8 At the front of the dubbed
abdomen, tie in a hen feather dull
side up, with the tips to the rear.
Later on we’ll pull this forward.
See the accompanying image for
details.
9. At the center of the thorax area, tie
in the rubber leg material so that you
have a total of 4 legs in an “x” shape.
|
 |
|
|
|
|
10. Dub the thorax, working the dubbing
around and between the legs.
|
 |
|
|
|
|
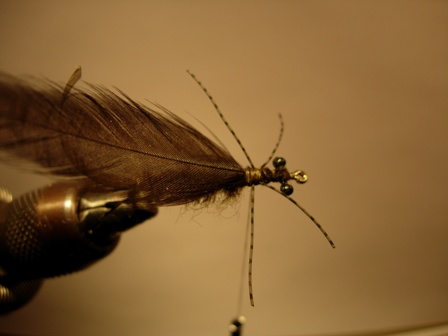
11. Pull the hen feather forward, while at
the same time sweeping the barbules
rearward. Tie off the feather behind the
eyes. |
 |
|
|
|
|
12. Grab the Thin Skin and pull it forward
over the entire body, stretching it a bit as
you do so. Tie it off behind the eyes, and
then again in front of the eyes. On the
remaining tab, cut a small “v” into the
material, pull the material rearward, and
tie it off again behind the eyes. Whip
finish at that point. |
 |
|
|
|
|
Tying
Tips
1. Be sure to leave at least 1/3 of the
front area of the hook for the thorax. This
is true for all nymphs, and is especially
essential for the proper construction of
this stonefly pattern.
2. When cutting out your
pieces of Thin Skin, give them a slight taper so that when the material is tied
in at the tail area, the narrower end is at the back. This will give the shell
back a tapered look, to match the taper of the abdomen.
3. Don’t flatten the lead
until it is covered with thread and Flexament. This will keep the lead from
breaking apart when you use the pliers to flatten it.
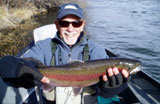
Bounce this beauty
through pocket water and be prepared for aggressive strikes. Set the hook at the
slightest hesitation of your leader.
Go rip a few lips, and…. |
|
|
|
|
 |
|