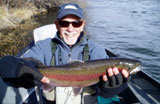
Description
This caddis adult imitation is based on a pattern created by Al
Beatty. He calls it the Hackle-Top Hopper.
When I read his article in Trout magazine, I
immediately tied a few and tested them out.
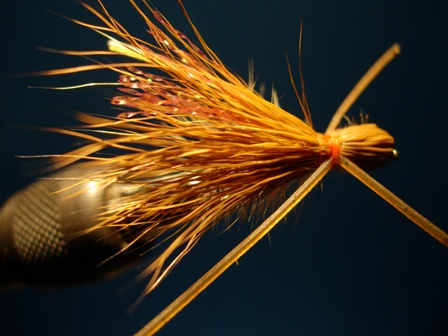
My findings were that, tied correctly, the
fly floats high, has great appeal to fish,
and is very easy to see on the water. It
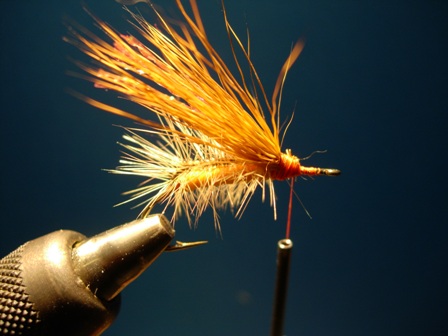
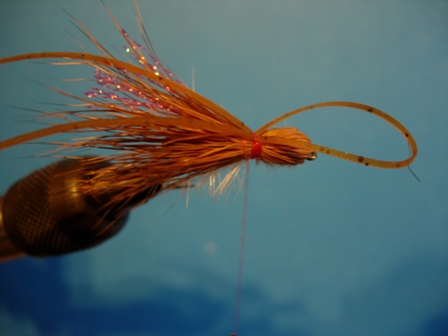
worked well fished by itself, but I really
liked it fished as the surface fly in a
hopper-dropper setup. It can support a
couple of flies and 1 or two split shot. I
have never liked Stimulators for October
Caddis adults (heaven knows I have used them
for many years) because of the very
unrealistic way that they sit up on the
water surface instead of floating flush on
the surface film as do October Caddis
adults. The name I have given the
much-modified fly is Bill's Big Fish Fly.
The reason is contained in the name itself.
The fly is not overly difficult to tie, but
it does require some intermediate tying
skills.
|
Tying Instructions
(For best viewing: (1) Maximize
your Browser Window. (2) Type "Ctrl
+ or -" to enlarge or contract the
webpage display. (3) Use the
Horizontal and Vertical Scroll Bars
to scroll right and up/down to
display larger photos in your
browser)
|
1.
Debarb the hook, place it in
your vise, and cover the shank
with thread.
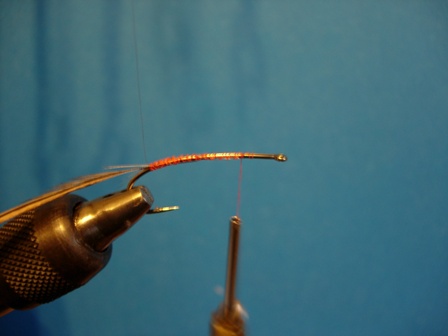
2.
Just above the back of the barb
tie in a 12 piece of 2x or 3x
monofilament. This will become
the hackle post; we will wind
the hackle around the
monofilament. If you have a
gallows tool with your vise, use
it to hold the monofilament
tightly in a vertical position.
If you dont have a gallows
tool, attach the mono to your
light or figure out some other
makeshift way.
|
 |
|
|
|
3.
At the same point, tie in a long
furnace or brown saddle hackle.
Wind it counterclockwise and
upward around the mono in widely
spaced turns; when you reach the
1 point begin winding downward
in very close turns. If done
correctly, this method will
allow you to achieve 30-40
turns. This helps to provide
flotation.
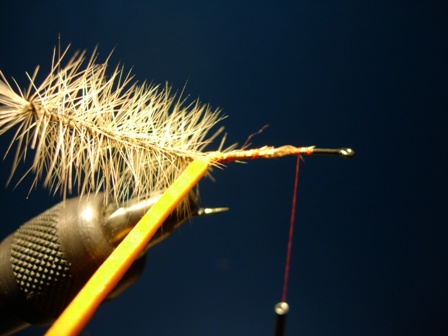
4.
When you have reached the shank
with the saddle hackle turns,
tie off the hackle in front of
the post. It helps to let your
hackle pliers hang over the
shank and release the tension on
the mono. You can pull the
mono/hackle backward and out of
the way while you are tying the
hackle down.
|
 |
|
|
|
5.
Cut a 1/8 strip of orange 2mm
foam, making a point at one end.
Tie the pointed end in just
ahead of the hackle post and
move your thread forward to the
1/3 point on the shank.
|
 |
|
|
|
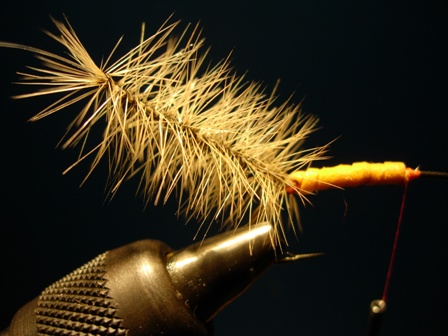
6.
Wrap the foam strip forward in
close, interlocked turns. Don't
stretch the foam as it destroys
its floatation qualities. Tie
the foam off at the 1/3 point.
This leaves the front 1/3 of the
hook for the rest of the steps.
|
 |
|
|
|
-
Apply some Flexament to the top
of the body, and then bring the
hackle post over the body. Pull
it tightly forward, making sure
it is directly on top of the
body. Tie it off at the 1/3
point.
|
 |
|
|
|
8.
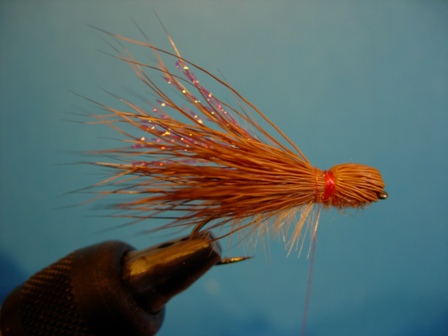
At the same point, tie in a
small bunch of orange crystal
flash. Trim it so that it
extends just slightly beyond the
hook bend.
9.
Cut a small bunch of burnt
orange deer hair, measure it to
shank length, and tie it in at
the same point, tips facing to
the rear. Don't stack the hair.
|
 |
|
|
|
-
Cut another, slightly larger bunch
of the deer hair. Measure it so it
equals approximately 1.5 times the
length of the shank. Trim the butts
even, and tie this bunch in directly
behind the hook eye with the tips
pointing out over the eye. Keep the
hair directly on top of the hook.
Wrap rearward, covering up all of
the butts. Place a drop of superglue
on the tied-down butts.
|
 |
|
|
|
-
Dub a thorax of creamy orange
Buggy Nymph, leaving the thread
at the 1/3 point. To achieve
this you'll need to dub rearward
from the hook eye to the 1/3
point.
|
 |
|
|
|
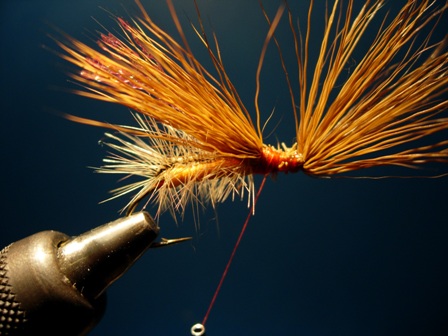
12.
Gather up the second bunch of
deer hair and pull it directly
upward; make sure you have all
of the hair, and smooth it out
as much as possible. Bring it
over the thorax, forming a nice
bullet head. Make sure that
there is no space left between
the front of the bullet heat and
the hook eye.
13.
Tie the hair down at the 1/3
point. As you do this, push the
hair down at the tie-down point,
in order to make the hair splay
outward. Place a tiny drop of
superglue at the tie-down point.
|
 |
|
|
|
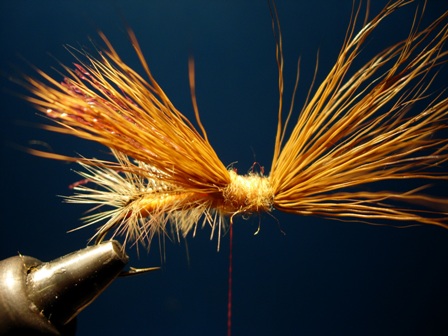
14.
Double a strand of pumpkin
Sili-Leg material. Place it on
top of the fly with the middle
of its length at the wing
tie-down point. Wrap 3 loose
turns of thread over the leg
material, and then cut the
doubled loop. Pull one of the
two sections down onto the far
side of the hook, and the other
onto the close side of the hook.
Wrap the legs down tightly.
|
 |
|
|
|
-
Whip finish between the legs and
trim the thread. Apply glossy
head cement to the top of the
bullet head. This increases
durability and provides a nice
finish to the fly.
|
 |
|
|
|
|
|
|
|
|
|
|
Tying
& Fishing Tips
1.
When making the wing sections on
this fly, don't stack the
hair'it gives the wing a more
natural profile.
2.
Make a black stripe on the top
of the wing, along the shank
axis, using a black Sharpie.
3.
Before fishing the Big Fish Fly,
apply silicone paste to the
entire fly. Use only a small
amount. When the fly begins to
lose its floatation, immerse it
in floatant powder and rub the
powder in with your fingers. It
will float like a cork after
this treatment.
4.
I tie this same fly with an
amber body to imitate a Golden
Stonefly; all black to imitate a
cricket; in yellow and olive to
imitate a hopper; and with a
yellow-olive body and black wing
to imitate a Skwala Stonefly.
|
|
|
|
|
 |
|