Description
Last year Andy Burk treated 6 Granite Bay
Flycasters members to a clinic on “Czech
Nymphing,” which is very similar to the
short line method that I teach in my clinics
and during guide gigs. Once properly
learned, these methods are extremely
productive. Learning the proper drift
technique takes time and patience, but it
pays significant, real dividends in the long
run.
Andy’s rig differs somewhat from the
rig that I use; actually, I like his rig so
much that I’ve modified my own in a few
respects to include some of Andy’s concepts.
I’ve learned a lot from watching Andy tie
and talking to him about fly construction.
Above all, he is a practical tyer — meaning
that he ties flies that do indeed catch
fish, and are not overly difficult to tie.
His “bottom roller” series certainly meets
those criteria. The flies are very heavy;
consequently they sink quickly and stay down
when drifted properly. One of my favorites
among the various rock roller patterns is
the Hare’s Ear Bottom Roller. That’s the one
we’ll tie for this month’s fly. If you want
to watch Andy tie this fly, check out his UTube video at
http://video.aol.com/video-detail/andy-burk-burks-bottom-roller/1094338183
Tying Instructions
|
|
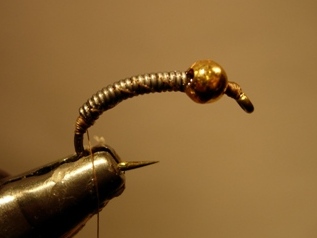
1.
Smash the hook barb unless you are using a barbless version of the
scud hook. .025 lead wire from the middle of
the hook bend to the bead. Push the bead and
lead back from the eye slightly, because the
fly will be tied off in front of the bead.
Apply a thin layer of Flexament to the bead
and lead.
2.
Tie the thread on in front of the bead and build up a small bump
there to keep the bead from sliding forward.
Jump the bead with the thread and cover the
shank/lead with thread.
|
 |
|
|
|
|
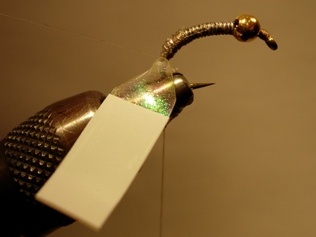
3.
Cut a piece of Sili-Skin approximately Ľ” wide and 1” long. Cut the
end to a point, but leave the
backing on for now. Peel the backing
back slightly from the point you
just cut, and tie that point in,
sticky side up. It should be tied in
on the lead wraps, and stretched
rearward while wrapping the thread
over it to the rear. Continue to
leave the backing on for now, and
let the Sili-Skin hang there out of
the way.
4. Tie in the monofilament ribbing at the rear end of the abdomen and
place it in your material clip for now.
|
 |
|
|
|
|
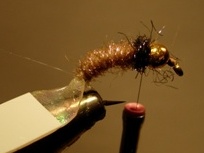
5.
Dub a nicely tapered abdomen with the Hare’s Ear color dubbing
material. End the abdomen
approximately 1/8” behind the
bead.
6.
Dub a collar (thorax) of the Peacock color dubbing material.
|
 |
|
|
|
|
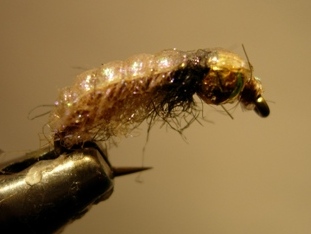
7.
Pull the Sili-Skin over the top of the body, stretching it slightly
over the top of the bead. Tie it
down in front of the bead.
8.
Wrap the mono ribbing forward, making sure that the Sili-Skin does
not move to the far side of the hook as
you wrap. Tie the ribbing off in front
of the bead and whip finish the fly.
|
 |
|
|
|
|
9.
Using a small wire brush or other dubbing teaser tool, rough up the
bottom of the fly somewhat to create a
fuzzy look.
|
 |
|
|
|
|
Tying
Tips
1.
When you are ribbing the fly, start with
close wraps at the rear, widening the gaps
as you go forward. If you look at a living
nymph’s segments, you will see this pattern.
2. Visit the
following web site for some color ideas for Czech nymphs, which are very similar
to Andy’s Bottom Roller flies:
http://www.czechnymph.com/en/index.php?show_page=gallery&g1section=1.&g1archive=0&g1current_item=30
Fish bottom rollers in pocket
water, using short line techniques. Go rip a few lips, and….see ya on the
creek! |
|
|
|
|
 |
|