Description
Jose guided Karl Wolff and me this last
November for four fishing days in La Paz,
Baja California Sur. I wrote an article for
this month’s issue on that trip, so I won’t
repeat myself here on how we fared. When it
came time for bluewater tuna fishing, Jose
said something like “mosca negra?” after
looking through my fly boxes. “You mean
‘black fly,’ right?” was my lame reply. He
grinned and nodded affirmatively. So I
scratched around—unsuccessfully—in my gear
for awhile as he watched patiently. He then
produced a trashed black-on-top,
white-on-bottom fly and had me tie it on. It
worked but I lost it, and we had no more.
The next day he produced a couple more that
he said were tied by his brother. They were
gorgeous. He declined my offer to buy them,
handing me one to tie on. I did manage to
talk him out of one of them on the last day
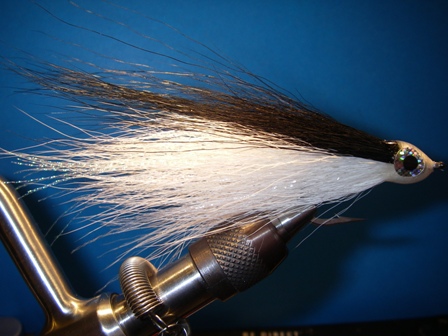
so that I would have a sample to copy. Here,
for your benefit, is the fly I now call
“Jose’s Mosca Negra.” Ron and Jeanne will
correct my Spanish if I’ve blown it.
Tying Instructions
|
|
1. Cover the hook with thread back to the point of the barb—no
further.
2. Bring thread forward to about
1/8” behind the eye. Cut and
clean a pencil-size bunch of
white bucktail. This bunch must
be long enough to extend about 2
shank lengths to the rear of the
hook bend. Turn the vise so that
the underside of the hook is up,
and tie this first bunch on,
holding it so that it does not
roll around the hook.
3. Tie in a slightly shorter bunch immediately on top of the first
bunch. Repeat this step with a
third bunch, again slightly
shorter. This will taper the
body to resemble a baitfish.
|
|
|
|
|
|
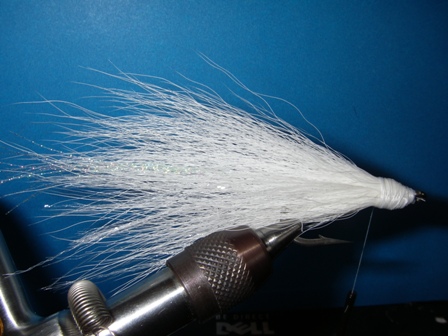
4. Turn the vise upright and tie
in the flash; it should extend
slightly beyond the longest
bucktail tips. Keep the flash
relatively sparse, as it is
supposed to represent a lateral
line.
|
 |
|
|
|
|
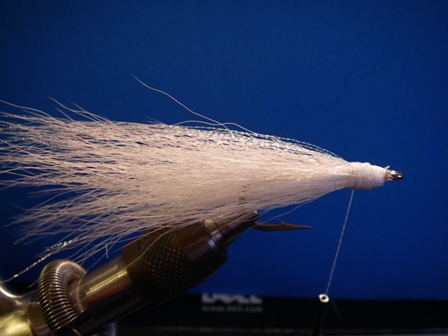
5. Tie in two bunches of white bucktail on top of the flash, with
the second bunch being slightly
shorter than the first.
|
 |
|
|
|
|
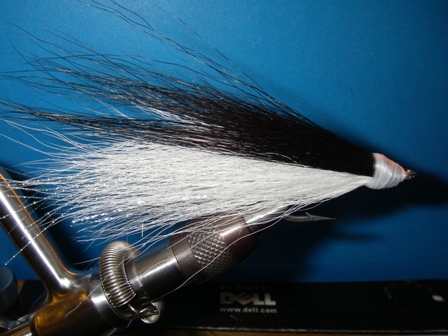
6. Tie in a half-pencil bunch of black bucktail on top of the last
two bunches of white.
|
 |
|
|
|
|
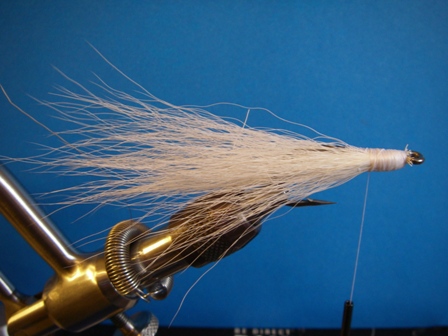
7. Begin shaping the fly head with your thread; it should end up to
be a bullet shape tapering to
the eye. See “Tying Tips” at the
end of this article.
8. Mix a small amount of five-minute epoxy on a sheet of stick-on
note paper. Holding the fly in
your hand, cover the head with
epoxy, turning the fly in your
fingers as you work it around
the head.
9. Once the epoxy has set but is still tacky, put the fly back in
the vise and place the stick-on
eyes on either side of the head.
Make sure that they are even
vertically and horizontally. |
 |
|
|
|
|
10. Coat the head and eyes with a second coat of epoxy, allowing it
to flow evenly around and over
the eyes.
|
 |
|
Tying
Tips
1. As you add bucktail to the
head of the fly, pay attention
to the shape of the head. Don’t
blunt-cut the butts; cut on a
taper so that when you finally
shape the head you won’t have a
“step” effect that will make it
impossible to create a smooth
head.
2. Stir the epoxy with a needle
or a glass cocktail stirrer.
Toothpicks seem to cause excess
bubbles in the mixture.
|
|
 |
|