|
|
|
|||||||||||
|
|
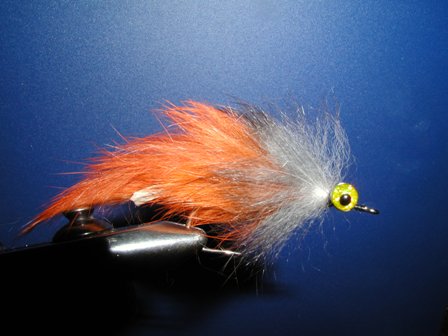
Ken Hanley's Salty Bunny
Ken Hanley and I have been friends for a long time. He never ceases
to amaze me with his creativity and, of course, his boundless energy
and enthusiasm. I watched Ken tie at the Sacramento ISE show, and
again at San Mateo. If you ever have a chance to watch Ken tie, be
sure not to let the occasion pass you by. You will learn a lot and
have fun doing it. At San Mateo, I sat with Ron and Jeanne English,
watching Ken tie several of his salt water patters. They were all
good, but I especially liked his “bunny fly.” He had no special name
for it, so that’s what I’m going to call it (until he tells me
otherwise). The key to this fly's success, according to Ken, is its
movement in the water. I like it because it is so simple to tie. I
even talked him out of one.
Ken discussed the
difference between the various cuts used to make rabbit strips. The
“zonker” cut slices the skin lengthwise, so that the hair is
directly in line with the cut. The “cross-cut” cut slices across the
skin, or side to side. The result is that the hair is cut on the
bias, making the hair quantity much more sparse. In constructing the
fly, Ken uses both types of strips. When purchasing rabbit strips,
be sure that you know exactly which type it is that you have
selected.
The fly can be tied
in different color combinations. Or, it can be tied in a single
color (e.g., black). The fly that Ken gave me sports a tail and body
of burnt orange rabbit, and a front collar of grey rabbit. Select
any color you desire for the contest—the flies will be judged on
their construction, not on the colors used.
Ken uses the fly in
salt water, fishing the surf and along rocky shorelines. Its
durability and attractiveness to fish makes it a “go-to” pattern for
him. The fly is made to ride upside down. It can also be fished as a
killer bass pattern. |
|||||||||||
|
Materials
|
||||||||||||
|
Instructions
|
||||||||||||
Copyright 1998 by Granite Bay Flycasters unless otherwise noted.