Description
Resting my casting (and catching) arm, I
watched as Keith stung a hefty Alaskan
Silver Salmon near the mouth of the Tsiu
River in southeast Alaska. The fresh brute
raced downstream as Keith’s reel screamed. I
walked over to watch him land the exhausted
bright female. “Seventeen pounds if it’s an
ounce” remarked our guide as he hauled the
fish off, destined for the cooler back at
the quad-runners we’d used to get to the
beach.
I’d been catching my share that rainy, windy
day on various typical Silver Salmon
patterns, but I was curious about the
odd-looking fly that Keith was now trying to
revive after it’s bout with the silver lady.
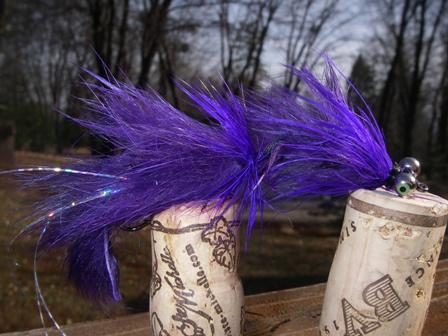
“What’s that?” I asked. “String Leech,” he
replied with a sly grin as he reached into
his vest for a big box loaded with the black
and purple beasts. “Take a couple,” he
offered. I thanked him and relieved him of
several 2/0 versions.
I’ve used leeches extensively, but never an
articulated version. The String Leech is so
named because it is tied with two hooks—the
front one being cut off at the bend and the
rear one attached to it with a “string.” One
particularly interesting version is the
“Fergus’ Mother of All Leeches,” which you
can check out via this link:
http://www.yagersflies.com/sprifestoutm1.html,
or see the fly article in Northwest Fly
Fishing magazine, Winter 2005 issue. Often
called an “articulated leech,” in the water
the fly moves irresistibly. In the case of
Silver Salmon, I suspect it just plain makes
them mad and they try to kill it. The
materials are simple and the tying
technique, with the exception of the string,
is not unusual. For some interesting history
on this fly, see:
http://www.flyfishusa.com/newsletter/112303
NOTE:
I will add “tying tips” at the end of the
article text each month. The tips will
usually relate to the fly featured in the
column for that month. However, if the steps
are self-explanatory, the tip(s) might
relate to a different technique or type of
pattern.
Secondly, be sure to check the web site for additional
pictures of the fly and/or the tying steps.
It is not possible to include more that one
picture in the Leader, but the website
affords us more space.
Tying Instructions
|
|
1. Bend the barb on the rear hook and place it into the vise. Cover it
with thread. |
 |
|
2. Tie in a strip of regular-cut rabbit strip at the bend as a tail;
the tail should extend about 1”
to the rear of the bend. |
|
3. Tie in a length of cross-cut rabbit and some cactus chenille. Wrap
the cactus chenille forward and
tie off about 1/8” behind the
eye. |
|
|
|
|
4. Wrap the rabbit forward, leaving a bit of space between
wraps to allow the cactus chenille to show through. Tie it off at the same spot. |
 |
|
|
|
|
5. Tie in several pieces of flash at the same spot (see tip
below) and trim to the length of the tail. |
 |
|
6.
Tie in a long webby schlappen hackle and take 2 or 3 wraps at the
head. Form a head while sweeping the hackle to the rear and whip finish. Set
this fly aside for a moment. |
|
|
|
|
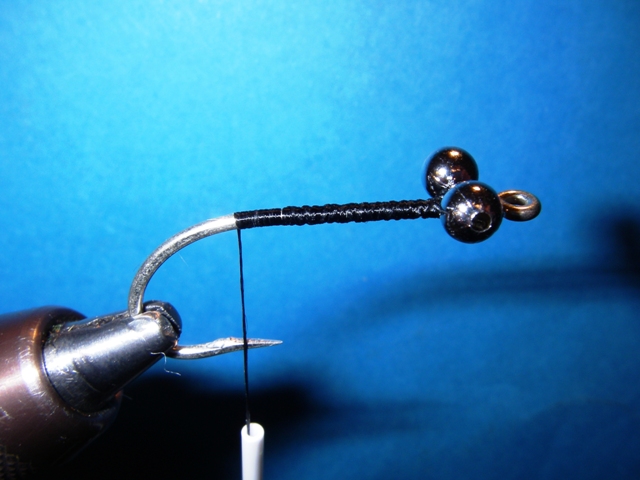
7. Place the front hook in the vise and cover the shank with thread.
Return the thread to the front
of the hook and tie on the eyes
on the top of the hook (see tip
below). Apply super glue. |
 |
|
|
|
|
8. Cut a 6” piece of 30# backing and color it black using a Sharpie.
Place an overhand knot at one
end and tie the material in at
the front of the hook, behind
the knot. This will keep it from
pulling through. Tie it down
firmly along the far side of the
shank, back to the bend. |
 |
|
|
|
|
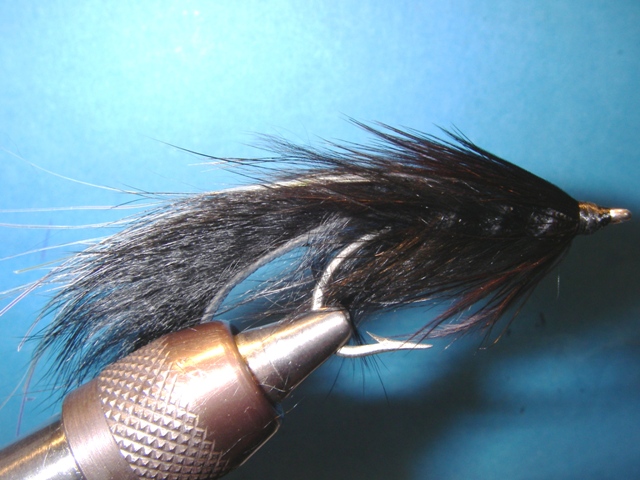
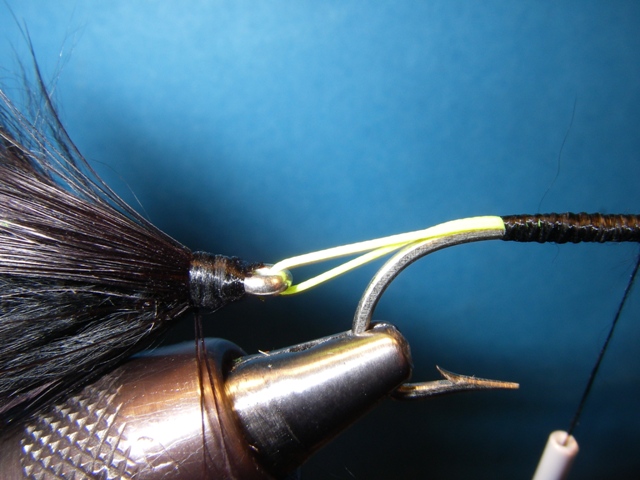
9.
Run the other end of the backing through the eye of the rear hook
and create a loop by tying the backing in along the near side of the front hook.
The loop should be about ˝” to 1” in length, creating a short separation between
the two hooks. Some tiers like the length to be longer. I prefer the shorter
connection to limit fouling of the two hooks. |
 |
|
|
|
|
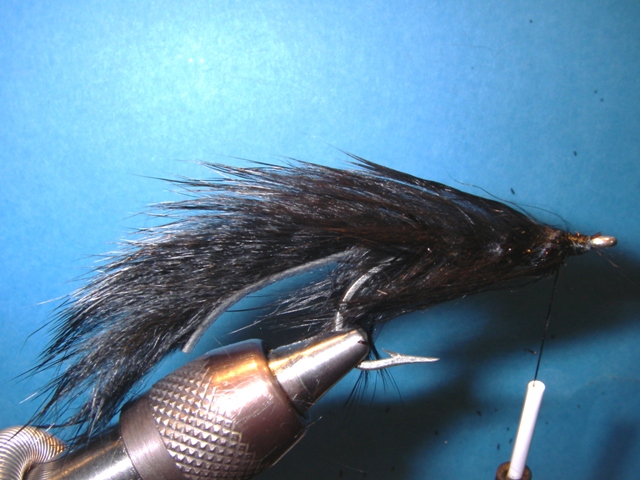
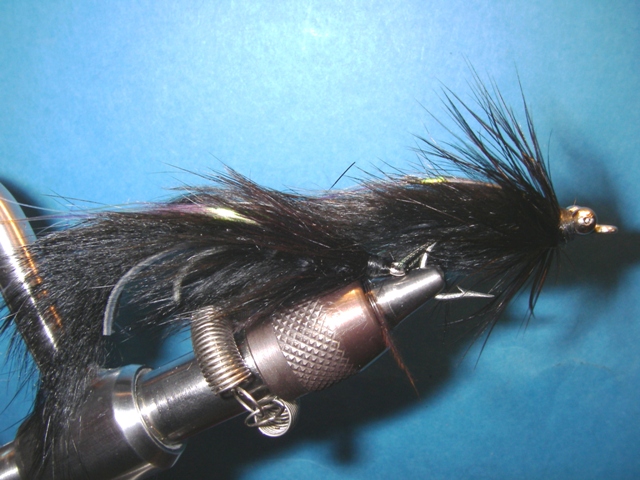
10.
Now tie the front fly in the same way that the rear fly was tied.
Alternatively, you can make the front fly (or the rear one) a different color to
provide contrast. The nice thing about this pattern is that you can tie it using
virtually any color of bunny strips. |
 |
|
|
|
|
11.
After you’ve finished the front fly and completed the whip finish,
cement the head area well as the fish will beat this fly about its head and
shoulders. Finally, cut the front hook off at the bend. |
|
Tying
Tips
1. It is faster and easier to
tie in materials such as
flashabou or crystal flash by
wrapping the strands around the
tying thread once and evening up
the two ends. This allows you to
control exactly where the
material will be tied in, and to
easily wrap it down.
2. When tying on eyes (whether on the top or
bottom of the hook) just wrap diagonally between the eyes and around the hook.
Once you’ve done this 5 or 6 times, wrap horizontally around the eyes. This
tightens up the diagonal wraps. Don’t bother with the “figure 8” method as it
ends up not nearly as tight. Always add superglue before proceeding with the
rest of the fly.
Tie a boxful
of these brutes, bend one on your line, and have at it! |
|
 |
|